For years, APIs like REST, GraphQL, and even SOAP have served as the backbone of service integration. However, the emergence of sophisticated AI models, particularly large language models (LLMs), necessitates a more adaptable and purpose-built standard. Enter the Model Context Protocol (MCP)—an innovative framework meticulously designed to bridge the gap between AI assistants and the vast systems housing critical data.
What is MCP?#
MCP (Model Context Protocol) is an open protocol that standardizes how applications supply context to large language models. It was created by Anthropic, the same minds who built Claude, and later open-sourced to accelerate ecosystem-wide adoption.
Think of MCP like a USB-C port for AI applications. Just as USB-C provides a standardized way to connect your devices to various peripherals and accessories, MCP provides a standardized way to connect AI models to different data sources and tools.
Why MCP Matters#
Contemporary AI models, while exhibiting remarkable capabilities in reasoning and generating human-like text, face an inherent limitation: they primarily operate within the confines of their training data. This restricts their access to real-time, proprietary, or context-specific information. Consequently, they often resort to web searches, which can prove inadequate, inaccurate, or entirely unavailable for private or internal datasets.
This fundamental constraint leads to significant shortcomings in even the most advanced AI systems:
- A customer support chatbot remains unable to access up-to-the-minute inventory levels or order details.
- A medical AI assistant cannot seamlessly cross-reference a patient’s medical history with the latest groundbreaking research.
- A financial advisor AI lacks direct access to a user’s current investment portfolio or real-time market fluctuations.
The Model Context Protocol directly tackles this pivotal challenge.
It introduces a universal and open standard that empowers AI systems to securely connect with live data repositories—be it internal databases, existing APIs, or proprietary systems—without the burden of bespoke integrations for every individual use case. By adopting MCP, developers can dismantle data silos and equip LLMs with the contextual awareness required to generate precise, timely, and highly relevant responses.
By effectively connecting the world of AI with the systems where valuable data resides, MCP unlocks the potential for truly intelligent and interconnected AI applications.
You can think of MCP as an API to empower other APIs for AI consumption.
Building Your First MCP Server#
Having grasped the transformative potential of MCP, let’s put theory into practice by constructing our very own MCP server. We’ll begin with a straightforward example focused on retrieving live weather and forecast information for a given location—a task often handled by LLMs through web searches with varying degrees of accuracy. While this example might seem familiar, it serves as an excellent foundation for understanding the core principles of MCP, which can be readily extended to access databases, files, images, other AI agents, and even execute tasks on your behalf.
To embark on this practical journey, ensure you have a machine running Python 3.11 or later, coupled with a stable internet connection and terminal access.
Let’s dive in!
Setting up the environment#
We’ll leverage uv, an exceptionally fast Python package and project manager built with Rust’s efficiency.
# mac/linux
curl -LsSf https://astral.sh/uv/install.sh | sh

# windows
powershell -ExecutionPolicy ByPass -c "irm https://astral.sh/uv/install.ps1 | iex"
Remember to restart your terminal after the installation to ensure the uv command is recognized by your system.
Setting up the Server#
You have the option to either clone the repository I’ve prepared and execute uv sync for a quick setup, or you can follow the steps below to build it from scratch.
# Create a new directory for our project
uv init weather
cd weather

# Create virtual environment and activate it
uv venv
source .venv/bin/activate

# Install dependencies
uv add "mcp[cli]" httpx
Now, create a file named main.py and populate it with the following Python code:
from typing import Any
import httpx
from mcp.server.fastmcp import FastMCP

# Initialize FastMCP server
mcp = FastMCP("weather")

# Constants
API_URL = "https://api.open-meteo.com/v1/forecast"


async def get_weather(latitude: str, longitude: str) -> dict[str, Any] | None:
    """Make a request to the Open Meteo API with proper error handling."""

    # Make the request
    async with httpx.AsyncClient() as client:
        try:
            response = await client.get(
                API_URL,
                params={
                    "latitude": latitude,
                    "longitude": longitude,
                    "timezone": "auto",
                    "current": "temperature_2m,rain,precipitation,wind_speed_10m,wind_direction_10m",
                    "daily": "temperature_2m_max,temperature_2m_min,sunrise,sunset",
                },
                timeout=30.0,
            )
            response.raise_for_status()
            return response.json()
        except Exception:
            return None


@mcp.tool()
async def get_forecast(latitude: float, longitude: float) -> str:
    """Get weather forecast for a location.

    Args:
        latitude: Latitude of the location
        longitude: Longitude of the location
    """
    # Get the forecast URL from the points response
    data = await get_weather(latitude, longitude)

    if not data:
        return "Unable to fetch detailed forecast."

    return data


if __name__ == "__main__":
    # Initialize and run the server
    mcp.run(transport="stdio")
Dissecting the Code:
get_weather: This asynchronous function interacts with the Open-Meteo API to fetch real-time weather data based on the provided latitude and longitude.get_forecast: This function is decorated with@mcp.tool(), designating it as a tool within the MCP framework. Tools are the actionable capabilities that your MCP server exposes to LLM clients. In this scenario,get_forecastaccepts latitude and longitude as input (provided by the AI), calls theget_weatherfunction to retrieve the data, and then returns the raw weather information.mcp.run(transport="stdio"): This line initiates the MCP server, utilizing the standard input/output (transport type) for communication with MCP clients.
To verify that your server is functioning correctly, execute the script from your terminal:
python main.py
If you don’t see any output then everything is working a expected and you can stop the execution.
Connecting to a Client#
The MCP ecosystem boasts a growing list of supported clients. For this demonstration, we’ll integrate our weather server with the Claude Desktop App. Download and install the application for your operating system. If you’re a new user, you’ll need to create an account or log in with your existing credentials.
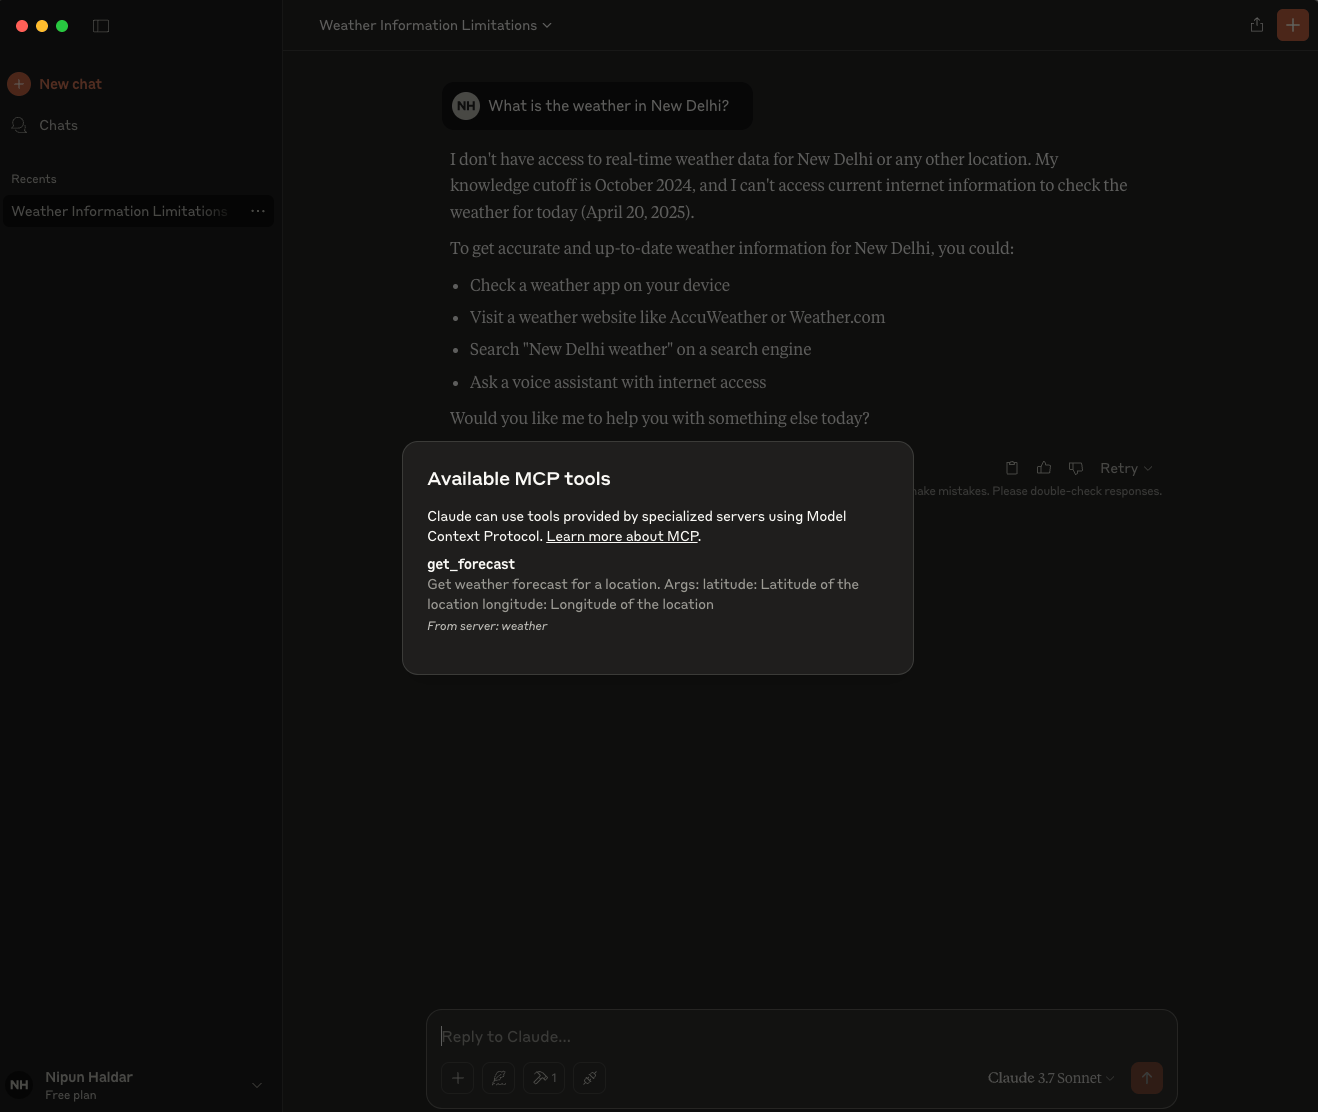
Now, try asking Claude a question about the weather in a specific location before integrating our MCP server.

As illustrated, Claude’s knowledge is limited to its training data (up to October 2024 in this example) and it cannot access live, real-time information like current weather conditions.
To enable live weather information, we need to configure it to communicate with our MCP server. Access the Claude desktop app configuration file located at:
~/Library/Application Support/Claude/claude_desktop_config.json(mac/linux)$env:AppData\Claude\claude_desktop_config.json(windows)
Open/Create this file in a text editor and add the following configuration under the mcpServers key. Ensure you replace /absolute/path/to/weather with the actual absolute path to the weather directory you created for your project.
{
    "mcpServers": {
        "weather": {
            "command": "uv",
            "args": [
                "--directory",
                "/absolute/path/to/weather",
                "run",
                "main.py"
            ]
        }
    }
}
Save the modified configuration file and restart the Claude desktop application.
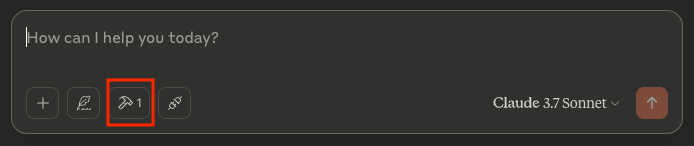
Upon restarting, you should now see the get_forecast listed in Claude’s available tools.
💡 If there is an error you can use the full path of
uvby runningwhich uvand using that full path in thecommandkey.
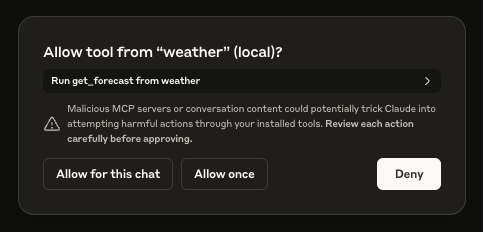
Now, ask Claude the same weather-related question again. You will be prompted to authorize the use of the “weather” tool.
Grant the permission. You should now witness Claude successfully accessing live weather data through your MCP server and providing a comprehensive and up-to-date response.
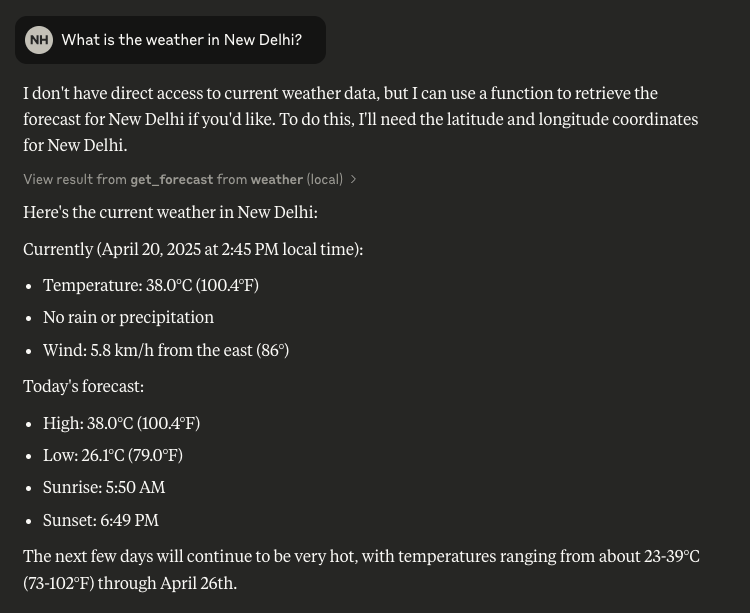
This demonstration vividly illustrates the power of MCP and its potential to extend the capabilities of LLMs to interact with real-world data and perform tasks dynamically.
What’s Next?#
Now that you’ve built your first MCP server, imagine the possibilities:
- Query private databases or spreadsheets
- Control smart home devices
- Fetch personalized documents, media, or messages
- Chain tools together with other AI agents
This is just the beginning. Dive in, experiment, and help shape the next frontier of AI.